I tend to schedule my gardening around spring holidays. Valentine's Day means planting indoor plants and gearing up. St. Patrick's day means planting cold weather outdoor plants and planting warmer indoor plants. Mother's Day is the kick off for the rest of the garden.
Now this is not an exact science but it does give me a day to plan toward. for example last year at this time I tried planting peas and had them in the ground by the 15th of February. This year the garden is under a foot of snow. As a side note, I saw no advantage to planting peas this early they did come up but no early than the seeds I planted a month later.
Now is the time of year when I plant my broccoli, and cauliflower indoors. They can handle the cold, and the are harvestable before the nasty caterpillars come out and ruin everything. During this time I also map out the garden I make a simple table on my computer, and then draw in the rows and plants when I hope to put them. There is a copy of my blank map on the PDFs page. Lastly I take a seed inventory so I can pick them up in early March or late February to beat the rush. Anderson's can get pretty crazy in April.
Saturday, February 16, 2013
Tuesday, July 17, 2012
Garlic and Taters
 It should be time to dig up your garlic. It should look or start looking yellow and dried up, this means that it is ready to harvest. So if it looks like that dig it up and put it somewhere to dry.
Also I wanted to share my potatoes. Normally I wouldn't dig them up until the first frost but they were starting to show signs of blight so I dug up the ones that had the worst of it and here what I got. Not bad eh?
 |
| Not bad for two months early. |
Thursday, April 26, 2012
Cover those Taters!

Thursday, April 12, 2012
What are you doing and/or planning?
The start of the garden season is upon us as previous posts would show. Currently, I have peas sprouting, leaf plants sprouting, and garlic sprouting. My brussel sprouts are growing and I am waiting on potatoes to sprout so I can begin covering them.
The plan for the weekend is to plant carrots. Put up pea trellises so they can climb and stay out of the dirt (post of follow). Weed the garlic and put down some Preen.
A brief note about the Magic of Preen:
Preen is a granule, when added to the soil, prevents weeds from growing by killing the seeds before they germinate. It should be applied to soil where plants are already established. It will kill your vegetable seeds if they have not properly germinated. However, it is wonderful once you have weeded to be able to apply the Preen and not have to worry about nearly as many weeds. Keep in mind it's not a cure all. You will still get weeds but it lessens the blow and makes weeding much more manageable.
Monday, April 9, 2012
Bye Bye Brassicas.
Well I planted my brassicas (broccoli and cauliflower, namely) a little too early. Well that is not entirely true. It wasn't that I planted them too early I didn't cover them on the really cold nights and they froze to death. Lesson learned. I will either wait next year until April or go out on the cold nights and cover the plants. Lucky for me, I have more seeds!
Wednesday, March 28, 2012
What Can I Plant?
It is fast approaching garden season. In some cases it has already arrived. Currently I have my leaf vegetables (lettuce and spinach) in the ground seed and small plant. I also have my brossicas (broccoli, cauliflower, and brussel sprouts) growing in small plant form. It may be a tad early and I may have to watch the weather for cold nights but I have done it before this early. I also planted some radishes and my peas and potatoes all in a seed form. There isn't really much else that is safe to plant currently, outside. However my vegetables indoors are thriving, and hope to be able to get them in the ground sometime after Mother's Day.
Monday, March 12, 2012
In Vegetables I Trust
I thought my last post would be more helpful if I shared the vegetables I like and why so here goes.
Beans
I really like Slenderette as a bush variety. The grow long and thin and don't really get too thick however I plant Pole Beans Blue Lake Variety mainly because they are easier to pick as they grow up my trellises.
Beets
Detroit Dark are the most common variety but I really like the taste of Scarlett Supreme, they're what I plant.
Broccoli
I plant Premium Crop because is produces a nice big head, and further pickings produce good sized flowers. I have tried the Packman and didn't really like the size of the flower. However the flavor of both is comparable.
Cantaloupe
I have only really planted Roadside but I absolutely love them. I am trying a new variety this year along with roadside called Ambrosia so we will see.
Corn
I don't plant corn anymore because of the space it takes up and it is pretty cheap in the store if you can't find someone willing to share. However, when I plant it I plant Ambrosia.
Cucumber
I really like Armenian cucumbers and have planted them in past. They are a very different taste and texture. The best part about them is they don't get bitter if they stay on the vine too long. The best regular variety that I have found is Sweet Slice. They are great but they will go bitter.
Peas
I plant two varieties of peas: a pod pea where you just eat the pea seed and a sweet pea where you eat it all. The pod pea I plant is Little Marvel however I am trying Lincoln this year as well, so we will have to see. The sweet pea I plant is Oregon Sugar Pod, they are amazing.
Pepper
I don't do spicy peppers. The two peppers I plant are California Wonder and Orange Sun.
Potatoes
I simply plant Red potatoes nothing fancy.
Squash
My family has always planted Buttercup. It has a much stronger flavor and isn't as bland as Butternut. I am trying Acorn this year so we will have to see with that one as well.
Tomatoes
I plant Roma and that is it. I love the versatility of the Roma it doesn't have a lot of water for salsa, sauces, or other cooking things. They also work great on sandwiches I just cut them lengthwise.
Zucchini
I plant Golden Rush zucchini. It is a yellow zucchini which we like a lot better. A couple other perks is you can see it so it doesn't get too huge and not to mention there is always someone who has a green variety.
The Jury's still out.
Carrots
I have really found a variety I love I have planted Sweetness a number of times but I haven't found any that I love so I am trying a wide variety this year in hope of finding a good variety.
Cauliflower
I am trying Snowball and Stardust for the first time this year. I will let you know what I like.
Eggplant
I am trying the variety Long Purple will share too.
Monday, March 5, 2012
Buying Seeds (Ode to Anderson's)
I was recently asked where I get my seeds and so I decided to make it a post as well. I guess I should start by saying that I buy my seeds from Anderson Seed and Garden in Logan, UT, link is on the sidebar. I have bought seeds at various stores from Walmart to the local Coop but I keep coming back to Anderson's I have even looked into seed catalogs. However there are several reasons I keep going back to Anderson's.
First- I know what I am getting and don't have to wonder if I can get that same thing next year, this works with seed catalogs as well.
Second- I can buy my seeds in bulk meaning if a I need a lot of one seed or very little of another I can get that I don't have to guess with buying seed packets. This is also a nice feature of the seed catalog.
Third- Most of the seeds they sell grow well in a Utah environment or in my area.
Lastly and Most Important - I don't have to guess about certain seeds. When I go in (after doing my online research) I can ask someone who can tell me about the differences in seeds and what to expect from different plants. I can ask about the popular seeds and what people like and why they like them. They are great at this. I can't get that with seed catalog plants. I mean I guess I could if I read up enough but I really don't want to, when I can ask someone.
I looked at a seed catalog this year comparing prices and Anderson's was quite a bit cheaper as well. So I will be going there for a long time to come.
The only downside that I can see to Anderson's is that they don't have as many varieties of seeds as a catalog company but they have what I need.
Saturday, February 25, 2012
Organizing your Space

Every winter around the middle of January I plan out my garden. Here is how I do it. Hope it helps.
First - I make a list of all the vegetables and flowers I would like to have in the garden. I add how many rows or hills I want to plant as part of this list.
Second - Once I have my list of ideas I print out my Garden Plot Map and with a Planting Schedule I draw out where I plan on planting my stuff. The Garden Plot Map is designed for my 20' x 50' garden but could easily be manipulated to fit your garden. I use the spaces on the left side of the first page to write notes about vegetables.
Those are the steps I take not that thrilling but there is some reasoning behind planting things in certain spots which partly come from knowing your garden, but I will share mine and you can adapt for your situation.
Tips
My garden doesn't have very many shade options so I use my beans, peas, corn and other taller plants to shade my shorter plants.
Different plants need different amounts of water my garden is not perfectly level so I try to plant plants that like more water on the lower side of the garden. I also try to keep my plants that don't like a lot of water away from the edges of the grass where water intended for the grass falls.
I try and plant my plants that spread like cantaloupe, squash, and cucumbers near plants that are colder weather plants like peas. This way the spreading plants can grow into the space that the colder weather (already harvested) plants recently occupied.
I don't plant corn, it takes up too much space for what you get and there is enough people around and it's pretty cheap in the stores to not warrant the need to plant it.
 This year I got a composition notebook to keep track of all my maps for year to year so that I am moving my crops around. It's not good to plant the same things in the same spot year after year. It also helps jog my memory about what worked or didn't work in certain spots through the years. It has been much better that a stack of papers by my seeds.
Monday, February 20, 2012
Tricks to Try Again
In previous posts I talked about a method planting potatoes in straw, planting carrots on toilet paper, and adding epsom salt when planting tomatoes. All planting tricks that I will be trying this coming year. Here's why:
Potatoes in Straw

First of all it worked I got a decent potato crop from the small section. The best part about it was harvesting. All I had to do, to harvest the potatoes was sift through the straw and pull them out. The potatoes were also in a nice uniform size. This year I plan to plant a whole row to see the difference between other rows.
Carrots on Toilet Paper
I will never plant carrots differently. I had doubts that white glue would work it did but this year I will be using a flour paste. The only other change I will make is gluing the carrot seeds closer since they had far more space than they needed.
Tomatoes and Epsom Salt
 Best tomatoes I have ever planted. I had very little disease is any unlike years past. The fruit was very high quality as well nice and firm. Definitely an improvement on bottom end rot.
Preparing the Soil in Spring
I had a request about getting the actual garden soil ready for the spring planting. The best thing to do is put down as much organic material as possible in the fall and till that in. Organic material being manure, dead leaves, grass clippings, straw ect. If you are just starting out and need to do something for the soil in the spring then I would recommend putting down a nice (2-3 inches) covering of manure at this point cow would be best since it isn't as high in nitrogen. You could also buy compost and spread that liberally as well. Compost is incredibly safe so you could do as much as you could afford really. We have a green waste recycling place near us that works great and is fairly inexpensive. Some other nice things are peat moss or a product called coir, which is essentially coconut husk. However depending on the size of the garden it could be expensive. It also wouldn't hurt to put done a chemical fertilizer along with some iron. I use a 16-16-16 fertilizer with some nitrogen mixed with 46-0-0. These numbers are on all fertilizer bags. Be careful not to use too much nitrogen, however it is essential in breaking down organic matter into a usable substance for plants. The bag will tell you how much per square foot. I have also been adding coffee grounds which are also a good source of nitrogen and other nutrients.
The organic material will help in breaking up and losing the soil while the fertilizer will help in breaking up the organic material. If your ground is really hard straw and/or sawdust does a nice job of loosening up the soil as well as vermiculite however it is pretty pricey.
Quick Notes:
Things to add before tilling:
Cow Manure
Compost
Peat Moss
Straw
Vermiculite
Coir
Chemical Fertilizer 16-16-16 with Nitrogen 46-0-0. I would say 2 to 1.
Iron (Granulated)
Sunday, February 19, 2012
Getting Ready for Spring
Here are a couple tips and/or helps for getting ready for spring planting.
Recycle or that is Reuse

If you refer back to my When It's Cold post, it talks about covering your plants using various materials a cheap one is milk and juice cartons. Now is a great time to start collecting them. They can be stored easier if you cut off the bottom and then stack them. Milk and juice cartons are great to cover individual plants on those chilly nights. Another great item to reuse are egg cartons perfect for starting plants especially since they are biodegradable and can be planted right in the garden. Lastly yogurt cups make create plant starting pots as well.
Plants to Start Indoors Now
 I am currently starting the following plants indoors to give them a jump start.
Broccoli, Brussel Sprouts, and Cauliflower these plants are pretty hardy when it comes to cold weather. Cabbage would do fine too but I don't plant it. I also read at my seed store that now was a good time to plant peppers indoors. I think it's a bit early since they shouldn't go in the garden till mid to late May but I may try a few seeds in a week or two.
Planting in the garden
I recently planted a row of peas, I usually plant them around St. Patrick's Day but the weather permitted the other things you could look into planting in the near future is leaf vegetables like lettuce, spinach, arugula etc.
Saturday, February 4, 2012
Growing in the Grow Lab
 Well the grow lab works. I have spinach and lettuce sprouting. Here are a few tips that I have learned in the past couple years.
First- Keep your light as close to the plant as possible. This will help keep your plant from getting what they call "leggy." Basically the plan will grow an incredibly long stem. If your plants do get leggy however simply replant them into a larger container keeping the dirt as close to the leaves as possible. The plants need to stay next to the lights due to the fact that the bulbs can't produce light equal to that of the sun.

Second- The lights need to stay on for at least 16 hours for the same reason they need to stay close, power of the sun.
Third- The blogs I have read say to use seed starting soil because regular potting soil has a tendency to harden when it begins to dry. I have used potting soil every year and have not had a problem however I think seed starting soil would be the better choice.
Fourth- This one I think goes without saying but it is important so I will mention it. Make sure that your soil stays moist seed will not germinate as well. Also make sure that your containers have holes at the bottom to allow the water drain out so that it won't create mold and kill the plant.
Containers:
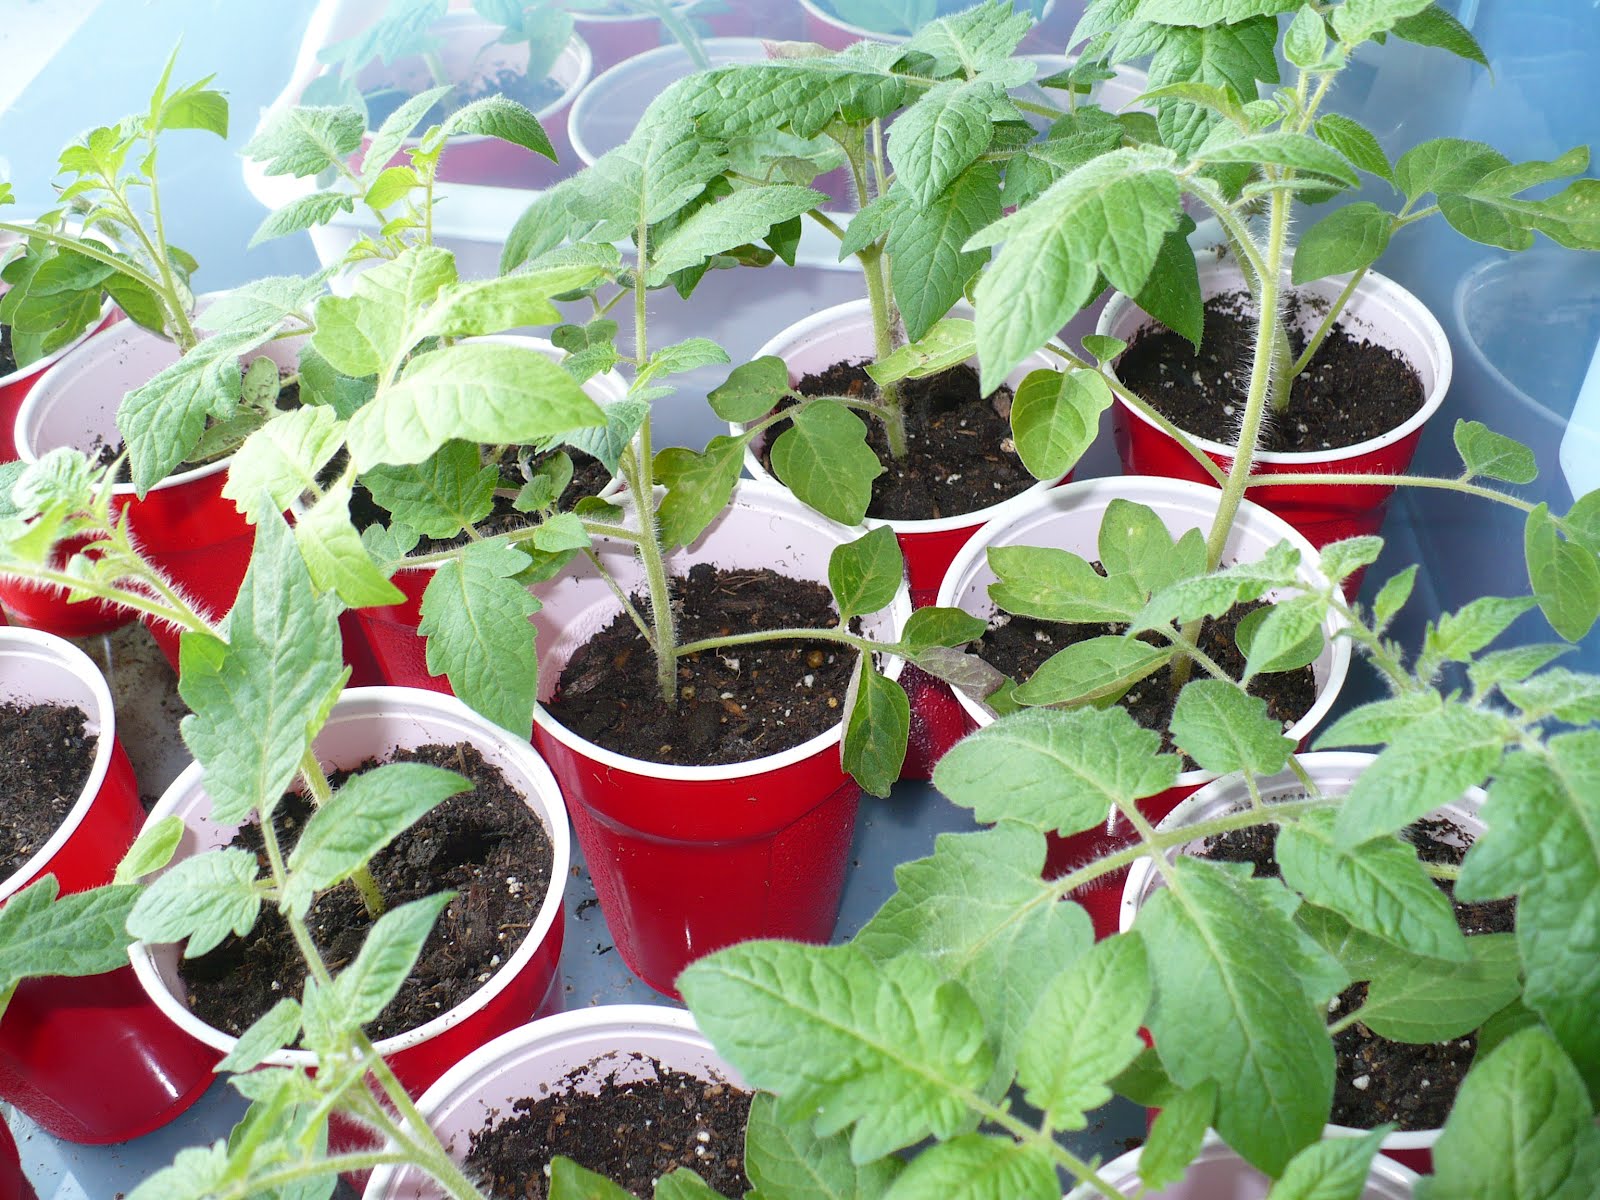
I have used a wide variety of containers. Free is always best so I try to use recycled yogurt cups. If I don't have those I use cheap plastic cups, paper cups can work but they don't hold up to the water very well. I have heard great things about egg cartons so I am trying those this year.
Coffee Anyone?


 I listen to two podcasts about vegetable gardening GardeNerd & Vegetable Gardening. The past week I heard on both that brewed coffee grounds were a great fertilizer for the garden and can be used in multiple ways. They mentioned that coffee houses like Starbucks saved their grounds for people for their gardens. I don't have a Starbucks near me so I didn't think much about it, not being a coffee drinker. However, I was at a lunch today and noticed that they served coffee, shocker I know. I asked them if they could start saving their brewed grounds and, to make it short, I can start picking them up Monday.
So now that I had the grounds I needed to know what to do with them. So I found a couple blogs that talked about it. The Cheap Vegetable Gardener was the most informative in my opinion.
It will depend on how many pounds I can get but for the next couple months I plan to spread them on my garden and till them in before planting. As the garden progresses I will add them to my compost and use them in sort of compost tea fashion. I am excited to see what it will do for my tomatoes and melons. Apparently they do wonders for those things.

Saturday, January 28, 2012
How to Build a Grow Light/Lab

Materials (What I used)
2 @ 4' Fluorescent "Shop Lights" 5' cord attached (Did not Include Bulbs, You'll want some)
5 @ 5' 3/4" PVC Pipes
14-16 @ 3/4" T- Joints PVC
4 @ Elbow Joints 90 Degree PVC
4 @ 2' Lengths of Chain (Smallest Gauge cost-wise)
I started by cutting the PVC pipes into foot long sections. I used a neighbors chop saw for this. I ended up cutting 21 foot long pieces of PVC. The idea was to keep them short for reinforcement purposes.

Then, with the help of my children, I began to assemble the foot long piece into squares using the T connectors. One Square for each side and two combined for the top. We then connected the sides and the tops with additional foot long pieces and the Elbow joints. This was the original frame design. However after looking at it and consulting with my wife and brother (via Skype) I decided to remove the central piece on the top and instead extend vertical legs to help counter with the weight of the lights. This worked much better.

When the frame was built I took the hooks that came with the lights and attached them to the 2' pieces of chain I bought. I then took the ceiling hooks that came with the lights and, after pre drilling the holes, screwed them into the inside of the top cross pieces. Screwing them into the inside allowed me to drape the chain over the cross piece helping to assure that the chain didn't come off the hook. I prefer a chain over twine or other string because it is easy to raise and lower the light as the plants grow.

Quick Bulb Comment:
They make special lights for growing plants which I have at school but Eric from Garden Fork.TV said that regular Fluorescent would work as well so that is what I went with. They key is too keep the light as close to the plants as possible.
My New Baby!

Disclaimer: This is my rambling story of how and why I got a grow lab. Instructions to follow.
For the past couple years I have been using my classroom Grow Lab to start my plants from seed. Due to the fact that I have been sharing space with science projects I have dreamed of having a home version. A place where my plants can grow uninhibited by the growth of their neighbors. The only problem with having a "Grow Lab" or growing station at home was cost. I just couldn't warrant the cost of the commercial growing stations. That has all come to an end.
Much like most of my other gardening ideas this one started from a conversation with a fellow gardening freak. He was bragging to me about how he was going to make a grow lab from an old shop light, and it was only going to cost him a couple bucks to build to frame. Wel that got me jealous which got me thinking. I decided to look into what a shop light might cost. I did a couple google searches and then posted a question on facebook. The google searches didn't come up with much however my facebook friends assured me that you could get a corded shop light for around $10. So I watched a YouTube video from GardenFork.TV on how to make a cheap growing station and he said that I could find shop lights for $10. That was all I needed and I was off to the hardware store to see what it would cost to make my own. Stay tuned for the instructions and finished product.
Wednesday, January 25, 2012
Long Time No See?
Well it's been a while since I have posted and I am looking to make amends by adding some new posts. Starting with the things that I learned last year. It seemed to be full of mistakes which usually means that I learned a lot. I am hoping to have a few follow up posts from last year as well as starting a calendar of this year's progress. The calendar is mainly for me to track things but it might be interesting to some of you.
Wednesday, June 15, 2011
Is it Too Late?

Is it too late to start planting? This all depends on the plants and when it starts to freeze in the fall. However in general I would say... Nope. However, like previously stated it depends on the plant. Keep in mind the list below is a guesstimated opinion, and some of these might not work or may work depending on the situation.
Too Late - Peas,
OK for Seeds - Beans, Corn, Beets, Carrots, Potatoes, Spinach, Lettuce
OK for Plants - Broccoli, Cantaloupe, Watermelon, Tomato, Garlic, Peppers, Eggplant
OK for Plants or Seeds - Cucumbers, Squash, Zucchini
Now it is wise to check the needs of each plant so that you can keep each plant adequately hydrated especially during germination. Carrots especially. Also keep in mind that not every plant will produce as well as they might have if they were planted sooner for example: I planted potatoes in July one year after harvesting peas and I got some potatoes but not like the year I planted them two months earlier.. However with the weather we have been having your guess is as good as mine. My motto is try it and if it doesn't quite work out at least I know not to do that the next year.
Wednesday, June 8, 2011
Why Did They Die? Part 4
 4 - Weather
 By weather, I mean outside temperatures. There are several plants, most plants, that can't tolerate cold temperatures. It is best to watch the weather and make sure to plant plants after the last frost day of the year. You can find your average frost dates at USU Freeze Dates. All you need to do is find your state and then your city. I have looked at few other websites but this one seems to have the most accurate information. Now this doesn't mean that if you plant after these dates you will be fine, this year being a good example, but it can give you an idea of when to plant tomatoes, peppers or other warmer weather plants.
Once the plants are in the garden it is hard to bring them inside on cold nights so it is best to find a way to cover them if there is a threat of frost.
This now ends the Why Did They Die? series. I would like to share a final bit of advice for helping your plants stay healthy and death-free. I honestly think it is what separates the successful gardens from the unsuccessful gardens. The advice is Time. Take 10-20 minutes a day to go out and walk through the garden. Check plant color, growth, abnormalities and anything else that might not look right. Take a little time to pull a few weeds; make mental notes about garden needs; and check to see if there is a need for watering. This short little check will do wonders for your garden. Well this should end the Why Did They Die? series, unless I come up with something else later.
Tuesday, June 7, 2011
Why Did They Die? Part 3
 3 - Bugs and Disease
 Honestly I wish I had a lot to say about these but I really haven't had a ton of experience with them. However I will share the little I know. The best advice I can give about bugs and disease is to learn about the problems in your area. Some plants tend to be more prone to diseases than others, raspberries being a popular one. I wish I know more about the diseases but I haven't spent too much time researching them. As far as bugs or pests there is a number of products on the market to kill them. I really don't like to use pesticide but I have used Sevin dust and some brand of grub killer. The only bug that has given my garden major problems is the notorious squash bug, which wasn't bother by the things I tried aside from squishing. They didn't really like that one.
Subscribe to:
Posts (Atom)